Hardwood Floors, Our First Home Renovation Project

I’m excited to share the entire process of getting hardwood floors in our home. This includes everything from the selection, pricing, and costs of all the materials that went into the installation. It wasn’t the easiest thing to do, but we are so happy with the results! These floors truly transformed our home!
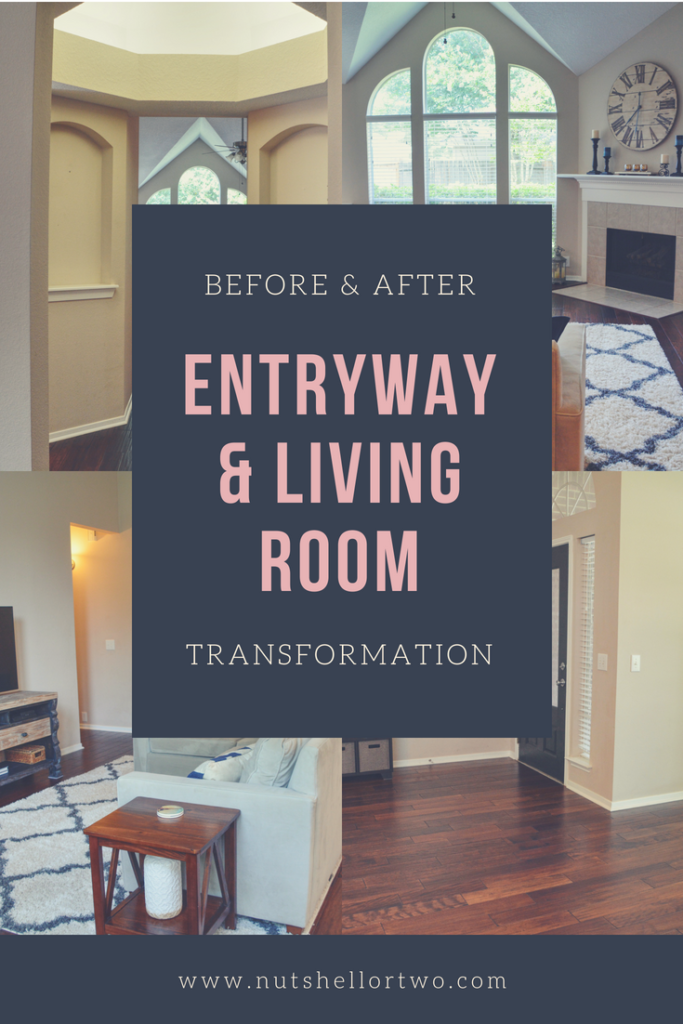
If you’re looking for more home makeover ideas, you can check out our Living Room & Entry Makeover post, which contains more before & after photos of the house.
Selection:
How do I choose the best floor for my home?
There’s solid hardwood, engineered hardwood, laminate, and even tile that looks like wood flooring. The best thing to do is to think about your potential buyers. What will add the most value to the home without overpricing it for the neighborhood? Even if you are not planning on selling your home, it’s important to consider what works well with the style of the home. Of course, it’s also important to get something you like!
My house was built in 2001 and is traditional in style. It has high ceilings and lots of natural light. The walls are light beige and the floorplan is fairly open. I loved the look of the light and even gray tone hardwood floors, but they didn’t seem to be the right fit for our house. I went to the flooring store multiple times with the idea of wanting something not incredibly dark, but not the 1980’s medium stain either. Aside from stain, there are other finishes hardwoods can have. I was drawn to the hand scraped finish.
I browsed flooring stores, but also looked at many pictures through Pinterest and Houzz, Here are some that appealed to me…
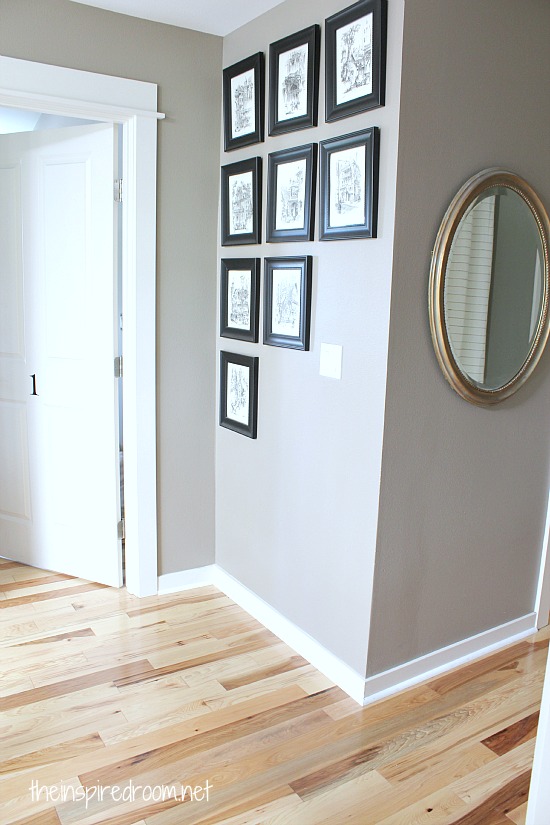
Light Hardwoods. A little more modern that what I was looking for, but It looks beautiful! They have a great before and after of a staircase on this site too: The Inspired Room
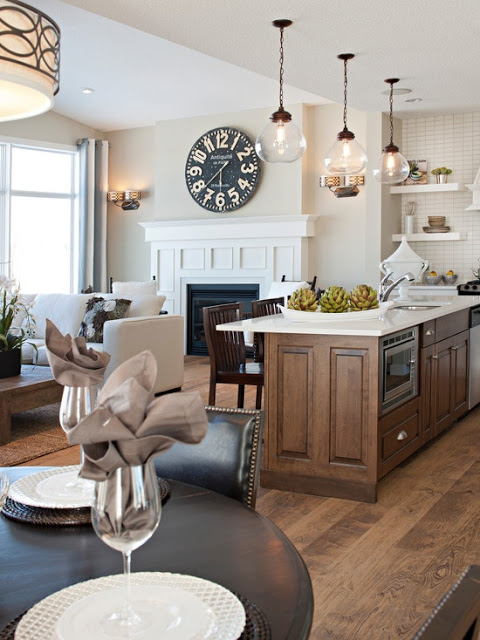
Medium/Rustic floors. Hello dream living/dining space! This looks so trendy and cozy. This one’s from Houzz.
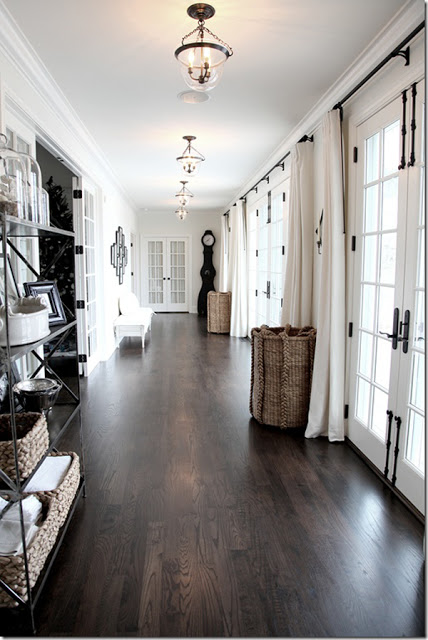
It’s hard to not be influenced by the sophisticated look of the contrasting dark floors and light walls. Found on fabyoubliss.com
Floor Shopping
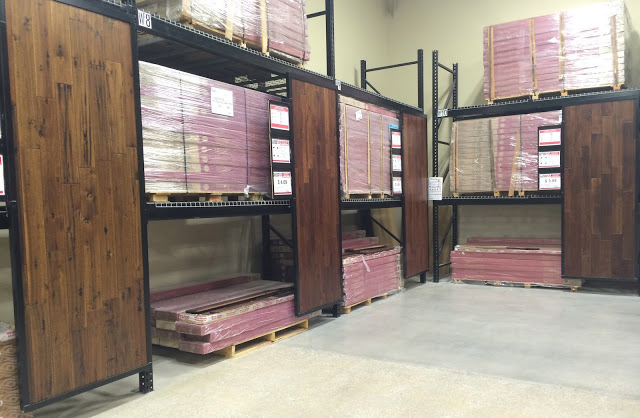
A look inside Floor and Decor, where we ended up purchasing from.
Advice on Stain of Floors:
When asking others for advice, the most common phrase I heard was regret for going “too dark”. When all the finishes are on display in the warehouse, some of the dark shades look more medium because they are displayed next to super dark and even black stained floors. When my husband and I showed off my floors to my friends and family, they commented “Oh, I love the dark color!” which was kind of funny to me since we chose a medium tone compared to the selections in the store.
Solid vs. Engineered Hardwood:
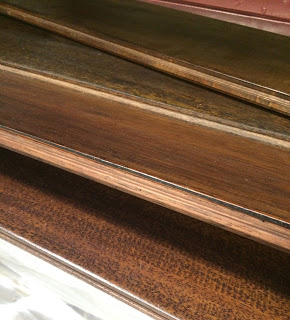
There are 2 types of hardwood floors, solid and engineered. Unlike laminate, both are true hardwood floors. The difference is that solid hardwoods are one single piece of wood, where the engineered version has a top wood veneer with high-density fiberboard wood layers under it. I’ve included some pictures demonstrating the difference. Solid hardwoods can be refinished multiple times, where engineered floors can typically only be refinished twice depending on the thickness of the veneer. One may assume that solid will always be more expensive than engineered, but that’s not always the case.
Here’s engineered hardwood with the visible fiberboard layer.
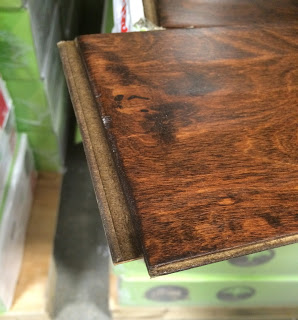
Regular solid hardwood is one full piece.
Hardness:
Not all hardwood floors are the same. Before choosing, make sure you look at a hardness scale and choose a wood that will be durable enough for your lifestyle. I have a dog, so I knew that I needed something strong. Here’s a hardness chart from Floor and Decor.
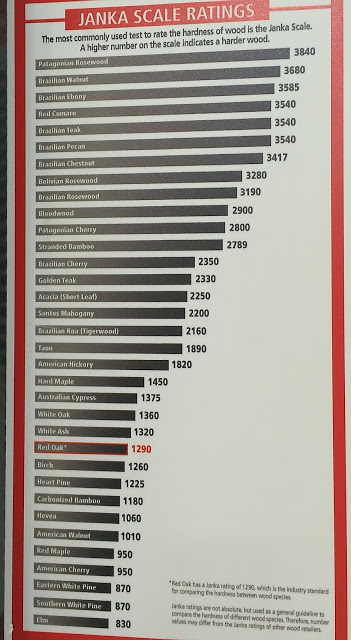
Although the chart lists the general hardness, the particular floor you choose may have a slightly different rating. Check the box and speak with the sales rep about durability before purchasing.
Shop more than once, compare prices, get inspiration from pictures, and take home samples to test out. Do everything you need to ensure your decision. After much research, we chose…
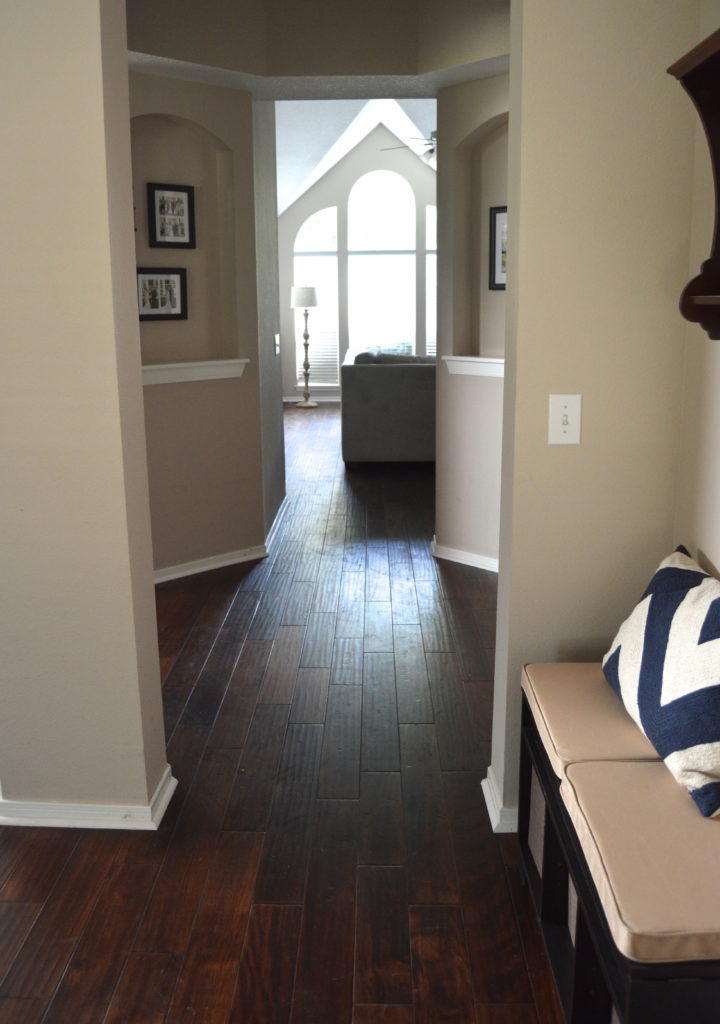
Solid hand scraped hardwood Telina Taun in walnut color! We really wanted an option that would add the most value to the home and liked the idea that the solid hardwood can be refinished if needed. We bought all the materials and hired a contractor for the installation. Here’s what we purchased for approx. 800 square feet of floors.
36 boxes of hardwood floors- $94.28 per box- $3,394.08
3 bags self leveling concrete $24.97 each- $74.91
5 buckets wood glue- $197 each- $985
240 linear ft. quarter rounds- 54 cents per linear ft- $129.6
6 transitions- $39.99 each- $239.94
total for materials plus tax = $5,221.47
Acclimating and Storing:
It’s imperative that hardwood floors have time to adjust to their new environment before installation. After the daunting process of unloading all the materials (literally over 1 ton lifted), we opened the ends of all the boxes and staggered them. We allowed 5 days for the floors to acclimate.
Installation:
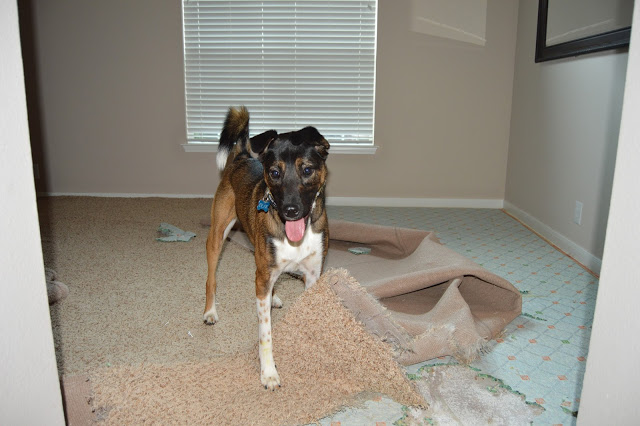
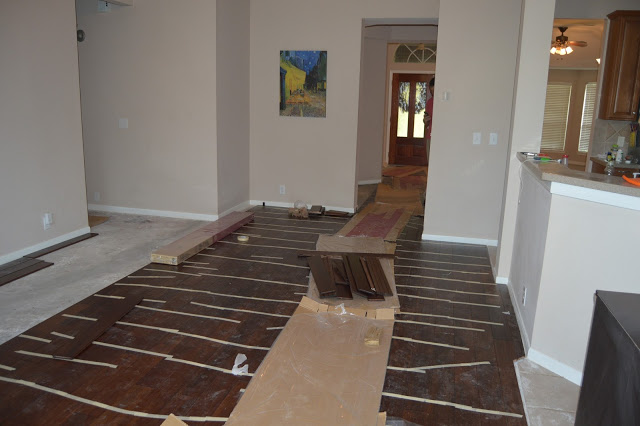
Then the work began. The hardwoods were going down in the formals, living room, hallways, and coat closets, so we moved all of our furniture into other areas of the house. My puppy, Bear, had the time of his life helping us rip out the carpet. He went on a dog vacay at my parents’ house for the week so he wouldn’t get in the way of the contractors.
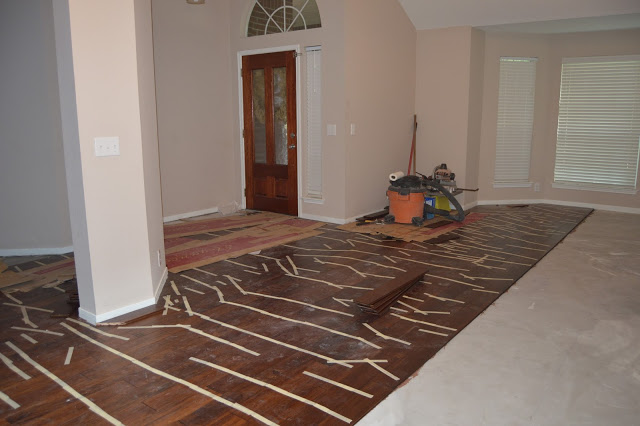
The contractors arrived Monday and completed the installation at the end of the day on Friday. We wanted to save money by going with the cheaper quote, but the phrase “you get what you pay for” kept us on our toes. The contractors did a great job with the floors, but they didn’t have the best work ethic. The first day they arrived an hour and a half later than scheduled. On day 3 of the process, my husband showed up at 11:30 am to deliver materials, only to find that the guys hadn’t been to the house. The fact that they weren’t punctual was difficult to deal with. We were originally told everything would be done on Wednesday, but the project was finally completed on Friday evening.
Living in a construction zone for a week.
Finished Product:
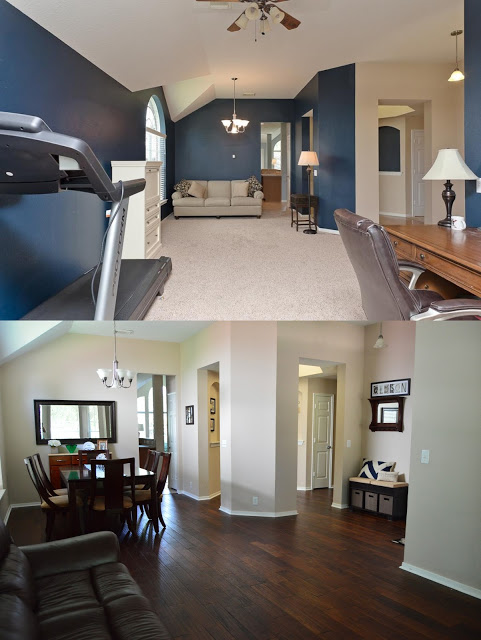
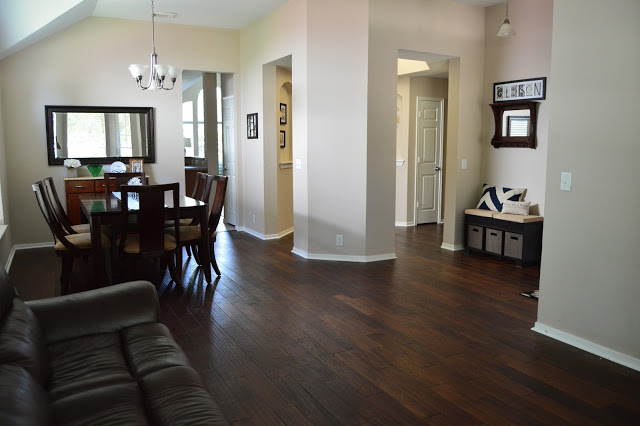
The contractors were really necessary for us because there’s no way we could have put in the floors as well as them. When everything was complete, we were so impressed with the end product! The floors looked awesome! I couldn’t believe how much larger the house looked with new floors! Here is a before and after picture of the entryway/formal area.
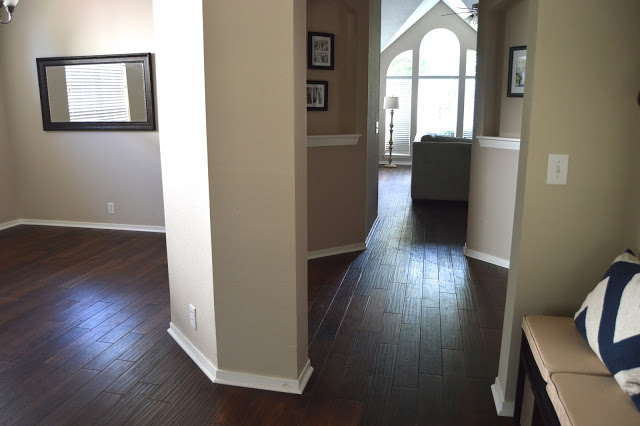
The first pic is from the realtor’s website before we bought the house. We really made this space look different!

Expenses
It’s so fun to transform a space and witness the results. Here is a breakdown of our expenses and the grand total for putting in hardwood floors.
total for materials plus tax = $5,221.47
Hiring Contractor for installation = $1600
Grand Total: $6,821.47
That’s about $8.53 per sq. ft.
This was our biggest project while living in the house and it really changed the look and feel inside the home. If you’re looking for more home makeover ideas, you can check out our Living Room & Entry Makeover post, which contains more before & after photos of the house.
Thanks for reading! Keep in touch and continue to follow the blog for more home decor, food, and travel inspiration.
